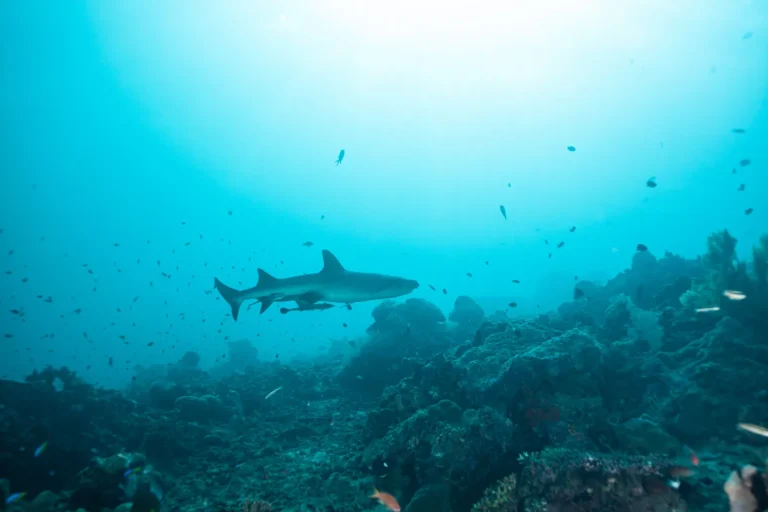
The trickiest part of filming sharks isn’t getting close, it’s making stillness look alive. You hover a few meters off to the side and a touch below, hold neutral buoyancy like you’re parked in a calm driveway, then aim your wide lens slightly up so the shark glides into clean blue space ahead of its path. Keep your fin kicks soft, elbows tucked, and let quick bursts and a fast shutter catch the drive-by, because the next pass changes everything.
Key Takeaways
- Hold neutral buoyancy and stay 1–2 m below sharks; stable depth prevents frantic finning and keeps your presence predictable.
- Position 2–4 m off the shark’s side and slightly below; let it pass naturally while you maintain spacing and safety.
- Frame wide with negative space ahead of the nose; angle up 10–20° to capture surface gradient and environment.
- Use fast shutter and short bursts for flybys; avoid constant repositioning by anticipating the path and tracking smoothly off-center.
- Scan 360° every 10–15 seconds and follow briefing signals; calm body language and no chasing reduce flight responses and chaos.
Film Sharks Without Chasing: Safety First
Always start by treating the briefing like your shot list, because sharks pick up on splashes, jerky fin kicks, and any surprise drift out of line, and you’ll film better when you’re calm and predictable.
Lock in shark safety by following the dive guide briefing and stay in position, then run a quiet 360° scan with peripheral vision, not a glued-to-the-monitor stare.
Know the group’s hand signals before you drop so you can respond fast without breaking spacing or kicking up extra commotion.
A wide-angle lens lets you keep distance while leaving negative space in front of the shark, like setting an open runway it can glide into.
Hold neutral buoyancy, soften your finning, and use controlled breathing so your bubbles and noise don’t ring the dinner bell.
If the plan includes attractants, practice no feeding/chumming yourself, and let the guides call the timing today.
Film Sharks Without Chasing: Depth and Positioning
Once you’ve calmed your fin kicks and locked in that predictable, low-noise presence, the next win is depth and positioning, because the cleanest shark footage often comes from where you choose to hover, not how hard you swim. Hold neutral buoyancy and hover 1–2 m below the shark’s usual depth, so you can ease up or down without quick drops that spook it. Prioritize move calmly so your body language stays non-threatening and you don’t trigger a sudden flight response.
| Goal | Where you hover | Micro-move |
|---|---|---|
| Depth match | 1–2 m below | slow rise/sink |
| Side slot | 2–4 m off | rotate in place |
Set positioning 2–4 m off its side, below the line, and angle up 10–20° so the shark swims into negative space with gradient. This passive framing works when you scan every 10–15 seconds, using buddy to hold steady distance, avoid chasing.

Film Sharks Without Chasing: Wide Shots and Framing
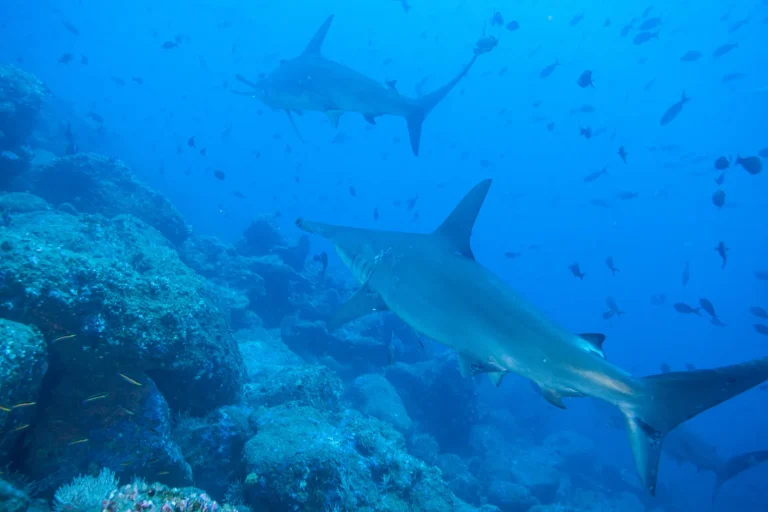
From a steady hover and a wide lens, you can let sharks do the traveling while you do the framing, grabbing full-body passes and that roomy, blue-water mood without kicking after them. Mount a wide-angle lens and stay close, so you get whole sharks and their watery neighborhood. If you can’t get close, a zoom can help, but wide-angle is usually the better choice for clear, immersive shark scenes thanks to wide-angle lenses.
Build negative space in front of the nose, about a third to half the frame, and you’ll compose for motion. Tilt to an upward angle, include surface texture or a pale sun gradient, and the shark pops off the blue. If they’re distant, go with no strobes, trust natural light, and skip backscatter glitter.
Keep slow camera moves, hold a short setup, then drift a few meters and reframe until the next calm pass comes through.
Capture Fast Passes: Settings, Steadiness, Mistakes
Dial in your settings before the mako streaks past and you’ll turn that blink-and-it’s-gone moment into a clean, sharp pass. Use a fast shutter: 1/800–1/1000 s in sun, or 1/160–1/200 s with strobes, then sit at f/5–f/8 and ISO 320–600, and adjust exposure between runs. For Oahu shark dives, prioritize GoPro settings that keep motion crisp while balancing blue-water exposure.
Leave negative space ahead of the path, track a touch off-center, and anticipate passes by reading the current and the shark’s shoulders.
- Pick wide-angle lenses, tuck elbows, and stabilize camera on a line or buddy when it’s safe.
- Keep trimmed gear, slow your breathing, and shoot short bursts, 10–20 frames.
- Avoid chasing, mind strobe distance, and don’t spray light into haze, backscatter loves it.
After each pass, check focus, reset your stance, and get ready for the next flyby.
Frequently Asked Questions
How Do I Choose the Best Time of Day to Film Sharks?
You’ll film sharks morning-afternoon after local sunrise, when visibility windows open, surface glare drops, and temperature gradients settle. Factor tidal cycles, lunar phases, diurnal patterns, weather fronts; use golden hour/blue hour for silhouettes when possible.
What Permits or Local Regulations Apply to Filming Sharks Underwater?
You’ll face permit requirements: filming licenses or research permits for protected species. In marine parks and no take zones, follow local ordinances, baiting rules, and drone restrictions; if you move footage/specimens abroad, secure export permits.
Which Color Correction Workflow Works Best for Shark Footage?
Measure twice, cut once: you’ll grade sharks with Raw grading and a Log workflow, set White balance, Color gamut, skip LUT stacking, use Secondary corrections for Skin tones, add Aqua punch, Desaturation techniques, finish Noise reduction.
How Do I Manage Backscatter and Particles When Filming in Murky Water?
Reduce distance and shoot wide angle; angle lighting outward, use strobe sync, lower ISO, and raise shutter speed. Add backscatter flags and anti reflective port care, lock manual focus, then apply post denoise only sparingly.
What Budget Lighting Options Help in Deeper, Low-Light Shark Encounters?
You’ll get lighting with LED panels, Video spotlights, and Light bars from Affordable brands; treat them as Strobe alternatives. Use GoPro lights in Underwater housings, match Color temperature, add Diffusion filters, and carry Battery packs.
Conclusion
Stay calm, stay low, and let the shark write the route while you frame it. You’ll hover a few meters off to the side and slightly below, angle your wide lens up, and leave clean water ahead like a runway. Soft fin kicks, tucked elbows, and quick bursts at a fast shutter catch the flash of teeth and tail. Reset between passes, trust the light, and you’ll bring home shots that feel wild, not rushed.