Most shark photos look awkward because you’re instinctively staring straight at the lens, and sharks read that stiff “spotlight” attention before your camera does. You’ll get a calmer, more natural frame when you breathe slow, settle into neutral buoyancy just below the shark, and soften your jaw so your whole body stops shouting. Keep your hands close, turn your torso slightly, glance for a beat, then let your eyes drift toward the flank, and you’ll see why…
Key Takeaways
- Breathe slowly (four counts in, six out) to calm shoulders, thin bubbles, and hold still during photos.
- Keep neutral buoyancy and hover 0.5–1 m off the bottom with minimal finning to avoid silt and drift.
- Angle your body 15–45° from the camera and pitch 10–20° between frames for a slimmer, natural, varied look.
- Hold hands close and still, loosely clasped at chest or on knees, extending only one hand or camera slightly for scale.
- Alternate eye contact: look just past the shark’s snout, briefly meet the lens, then soften gaze off-center for a documentary feel.
Set a Calm Shark Dive Photo Pose
While the sharks glide in and out of view, you’ll get your best photos by looking calm and staying put, so slow your breathing to a steady rhythm, about four counts in and six out, and let your shoulders drop as your bubbles thin out and your body settles.
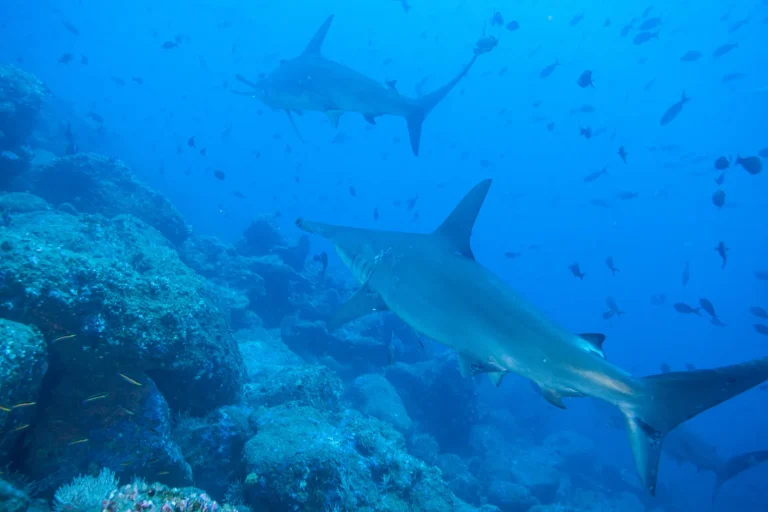
On shark dives, keep a forward-leaning posture, arms tucked in or resting on your thighs, so you don’t clutter the frame.
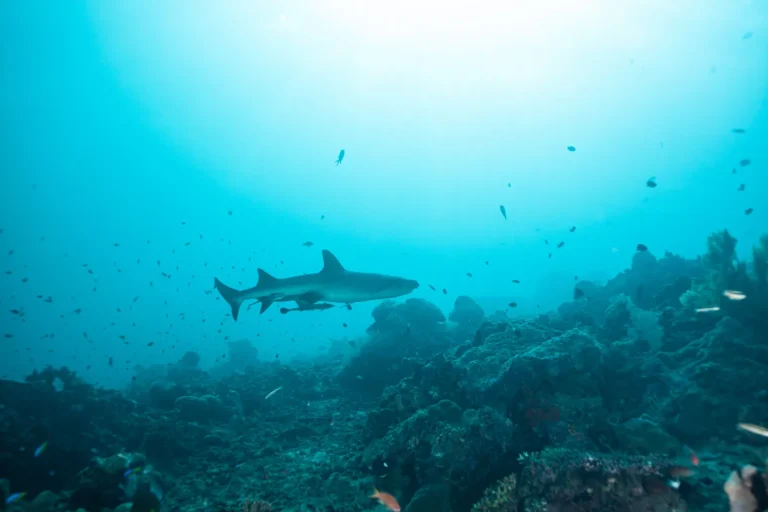
Set neutral buoyancy at the shark’s depth or a touch below, then angle your face toward it for calm body language.
Hold soft eye contact, or look just past its snout, chin slightly down.
Before the action starts, confirm your guide’s hand signals so you can stay still, keep spacing, and avoid sudden movements that disrupt the group.
With a wide-angle lens, follow the guide, keep space from other divers nearby for natural-looking photos quietly as it passes.
Hold Neutral Buoyancy for Clean Poses
Often, the cleanest shark dive photos come from nailing neutral buoyancy before the first fin even slides into view, so take a minute to trim your weight and hover about half a meter to a meter off the bottom with barely any finning, like you’re suspended on an invisible stool. Then hold a relaxed horizontal body position, arms tucked or extended, and let controlled breathing handle adjustments. Before you settle into position, do a quick mask and snorkel clear so you’re not distracted by leaks or water during the shot. Use minimal finning, one flutter to stop drift, so you avoid bubbles and silt. If rules allow, anchor your pose on sand or a line, lightly. To rehearse, practice in a pool and keep within ±10 cm for 30 seconds.
| Cue | What you do |
|---|---|
| Chest rises | Exhale slowly, settle 10 cm |
| Knees drop | Tuck fins, minimal finning |
Know Safe Distance: Bait, Guides, Sharks
Once you’ve got that calm hover locked in, set your “photo bubble” around the bait, the guides, and the sharks, and stick to it like a marked trail.
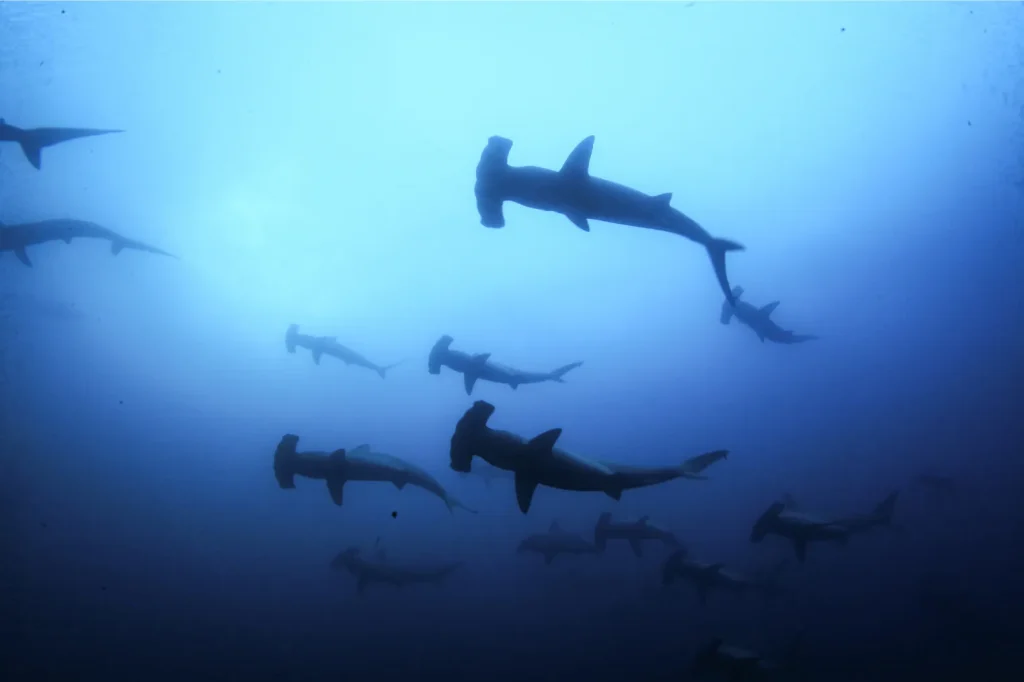
On shark diving, especially baited dives, your safe distance isn’t a vibe, it’s a number, usually 2 to 5 meters, unless your dive guides say otherwise. Stay at the distance, because chum, currents, and shark mood set the rules, not your zoom lens.
Remember that chumming vs feeding aren’t the same thing, and knowing the difference helps you predict how sharks may approach the bait setup.
Slide to the edge of the group, just off the bait line or crate, so you’re not in the traffic lane when several sharks swing through.
Keep eyes on your buddy and the nearest guide, breathe slow, and hold steady, then lean in or retreat only on cue, never chasing bait or sharks.
Place Your Hands for a Shark Dive Photo Pose
Keep your hands still and close to your body, because extra fluttering reads like noise in the water and can pull attention you don’t want.
Rest them neutrally near your chest or loosely clasped in front, or park one hand on your knee or tank valve if you’re steady, so you look composed and your fingers stay well away from bait.
Follow the No Touch, No Chase rule by keeping your hands to yourself and letting sharks pass without reaching or pursuing them.
Don’t reach forward or let your hands dangle below you, keep them visible and controlled like you’re posing for a calm portrait, not trying to high five a passing shark.
Keep Hands Still
Most of the time, the best shark dive photos start with what your hands don’t do, they don’t drift, flutter, or reach. To keep hands still, settle into neutral buoyancy, tuck elbows, and hold hands at hips or chest so you avoid sudden movements a shark’s lateral line can read like a doorbell. Remember basic ocean etiquette by moving calmly and staying relaxed around sharks to keep everyone safe and the encounter natural. If you’re shooting, use a relaxed two-handed grip on the housing, align strobes, and minimize bubble streams by pausing your exhale when you fine tune framing.
| Situation | Hands | Result |
|---|---|---|
| No camera | Light clasp | Calm signal |
| With camera | Two hands, steady | Clean silhouette |
| With buddy | Hands together | Scale, no gestures |
| Pose near bait | One hand empty | Safety, natural behavior |
Let guides handle the action, you just hover, breathe slow, and watch quietly.
Rest Hands Neutrally
Often, the cleanest shark-dive pose starts with where you park your hands, relaxed and close to your body so nothing flutters, flashes, or sends a burst of bubbles through the frame.
To rest hands neutrally, tuck them by your hips or chest, keep your hands relaxed, and place fingers together with a slight cup, palms down or in, like you’re smoothing water.
If you’re holding my camera on a tray, rest elbows against torso for steadier shots and less wiggling in wide angle.
With good buoyancy, you can let one side hand graze your thigh or, where rules allow, touch the sand lightly, while the other stays ready to shoot.
Move when you mean it, slow and level, and you’ll look calm, not busy.
Before you settle into position, keep your rig close and protected on the boat, using a padded camera bag helps prevent bumps and salt spray before you even hit the water.
Avoid Reaching Forward
Once your hands look calm and neutral, the next move is resisting the urge to reach forward, even for a “just one quick” pose with a shark by. You’ll get a great photo, and you won’t flash sudden motion that reads like prey. Keep both hands close to your body, calmly resting on your thighs or crossed at chest level, with fingers relaxed and together.
If you’re holding a camera, secure your arms, tuck elbows in, and brace the housing on your chest or tray. With a buddy, hold each other’s forearms at your sides, it looks natural and keeps hands out of the shark’s lane. Remember group spacing etiquette so you’re not drifting into another diver’s frame or the shark’s path while you pose. When currents push, use props for support like a downline, reef hook, or rail, and avoid reaching forward.
Turn Your Face and Eyes Naturally
Usually, the difference between a thrilling shark shot and a stiff, wide-eyed snapshot comes down to a small head turn and where you rest your gaze. Keep your chin slightly tucked, then turn your face 15 to 30 degrees toward the sharks so you land in a three‑quarters angle that shows both eyes and slims your profile. Let your eyes naturally track the animal, and look ahead of the shark, just past its nose, so you seem present instead of pinned to the lens. In low-visibility water, holding still helps maintain sharp focus by reducing motion blur as the camera hunts in murkier conditions.
- Breathe slow and soften your jaw for a relaxed expression, think “calm sightseeing.”
- Check mask positioning, keep the frame off your eyes and the strap low.
- Do a quick surface rehearsal with a buddy, then drop in confident every time.
Vary Your Shark Dive Photo Pose Shots
Change your body angle often, shifting from a relaxed, horizontal glide to a neat vertical tuck so each frame feels fresh, like swapping viewpoints from a balcony to street level.
Mix your eye contact styles, glance at the shark for a calm, connected look, then turn to the lens for a clean portrait, all while you keep breathing slow and your legs quiet to stay steady.
Rotate your hand and fin placement, tuck most of your limbs in, then extend just one hand or your camera slightly for scale, it reads confident on camera and keeps the scene uncluttered.
Hold your position and let the shark pass through your frame instead of pursuing it, using composition without chasing to capture calmer, more natural footage.
Change Body Angle Often
While the sharks cruise past like slow, silver commas in the blue, you’ll get stronger photos by tweaking your body angle every few frames instead of holding one stiff pose.
First, rotate your torso and hips 15–45° off the camera, so your outline looks slimmer and the shark’s path feels like a clean diagonal. Then angle your knees and fins a touch down or outward, letting a relaxed S-curve replace that locked, training-dummy look. For connection, turn your head toward the shark, but keep body angled away so you read calm, not confrontational. In Oahu, underwater photography tips like staying neutrally buoyant help you hold these subtle angle changes without kicking up bubbles or drifting into the frame.
- change your body pitch up or down 10–20° degrees
- shift your arm positions, from loose at your sides to lightly folded
- pause, breathe, reset
Let your buddy shoot on the exhale.
Mix Eye Contact Styles
Once you’ve started rotating your body instead of freezing in one pose, let your eyes do the next round of storytelling.
Try eye contact with a direct gaze for 1 to 3 seconds, then soften it by looking off-center toward its flank for a calmer, documentary feel.
Break the stare by glancing down, you’ll catch natural movement as it glides closer, and you won’t hold its attention.
Use peripheral awareness like scanning a busy street: look through your buddy or camera lens for one frame, then shift toward the bait bucket, the horizon, or divers’ bubbles.
Pair these beats with wide-angle framing so your body sits at the edge, giving viewers scale and showing you’re relaxed.
For crisp results in Oahu’s blue water, lock in wide-angle settings so your eye-line shifts read clearly from frame to frame.
Shoot a sequence, two portraits, then look away.
Rotate Hand And Fin Placement
Roll your wrists and fins like you’re settling into a comfortable seat, small adjustments that instantly make your frame look calmer and more intentional.
As you rotate hand, angle your palm slightly down, fingers together, and keep a relaxed arm so you don’t broadcast twitchy signals that can feel less sharks natural to nearby visitors.
For fin placement, cant your legs 15 to 30 degrees off your body, you’ll cut the bubble trail and draw dynamic lines that underwater photographers love.
If you’re deciding between filming with a GoPro or your phone in a case, keep in mind that GoPro vs phone case choices can change how steady and wide your shark-diving shots look in Oahu conditions.
- Rest hands on knees for a steady, zen look.
- Hover near hips when you want clean space around gear.
- Extend one hand 30 to 50 cm forward, then rotate it to show palm or back, creating depth and leading lines toward the shark.
Frequently Asked Questions
What Camera Settings Work Best for Low-Light Shark Dive Photography?
You’ll shoot RAW manual: ISO choices 400–1600, Shutter speed 1/125–1/200, f/5.6–f/8. Set White balance auto/custom, watch High ISO noise, match Strobe sync, skip Aperture priority, avoid Slow shutter except silhouettes, and use AF-C with burst.
Should I Wear Bright or Dark Wetsuits to Avoid Distracting the Shot?
Choose dark suits to avoid distraction; you’ll get better distraction minimization and contrast control. Use bright suits only for intentional scale, color psychology and visibility tradeoffs apply. Skip shiny logos; keep pattern choices subtle always too.
How Do I Prevent Mask Fog and Bubbles Ruining Close-Up Photos?
Like a window, you’ll stop fog and bubbles by using anti fog wipes or silicone defog, checking your mask seal, practicing breath control and exhale timing, adjusting face positioning, and carrying lens cloths for wipes.
Can I Use a Selfie Stick or Tripod During a Shark Dive?
You can use a selfie stick if boat regulations, guide permission, and safety protocols allow; choose short stick stability, practice movement restraint, use hand signals. Skip tripods; they’re unstable. Aim for glare reduction by framing.
What Should I Do if a Shark Bumps or Circles Me Unexpectedly?
Maintain stillness and take a slow exhalation; keep the shark in your line of sight. If it bumps or circles, avoid sudden movements, protect essential areas, signal dive guide, and plan exit route to group.
Conclusion
Keep it simple and the ocean does the work. You breathe slow, settle into neutral buoyancy just below the shark, and let your guide manage spacing, bait, and traffic. Tuck your elbows, rest your hands near your chest, and give a three second look before shifting your gaze to the flank, like you’re watching a train. Change only one thing at a time, chin, shoulders, or angle, and you’ll come home with calm, natural frames.